

How many times per day do you visit your property or business website? If you’re like us at Catalyst (we visit property websites daily), then you and your employees may account for a significant percentage of the total direct traffic to your site in Google Analytics.
To remove visits from your computer or any computer on your network from your traffic report, you’ll need to set up a filter that lets Google sift through the incoming data and remove visits that are identified with the unique Internet protocol (IP) address of your computer or network. (An IP is a network address assigned to your computer either by your network or by your Internet service provider.)
Before you can create the IP filter in Google Analytics, you’ll need to first look up your IP address. You can do this by searching Google for “What is my IP address?” as shown below:
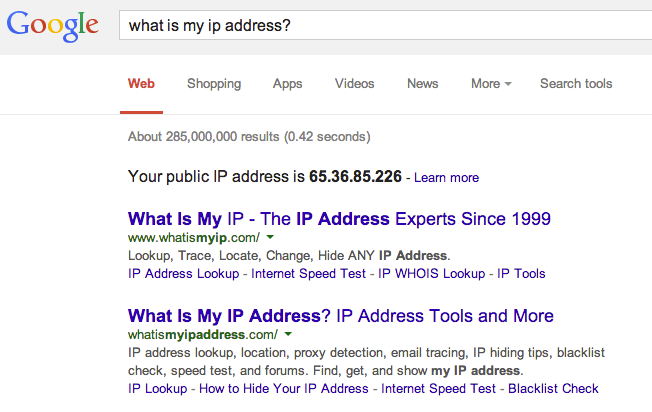
Once you’ve gathered the IP address number, you’re all set to add the filter in Google Analytics.
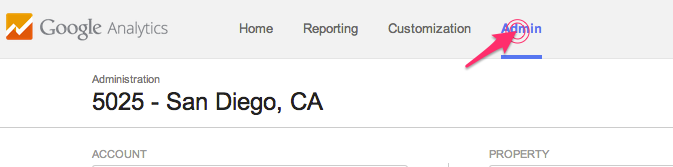
First, head over to your Google Analytics account and click on “Admin” for the website you want to add the filter to. If you use Google Analytics for multiple properties, you may first have to select the property website before clicking the “Admin” tab.
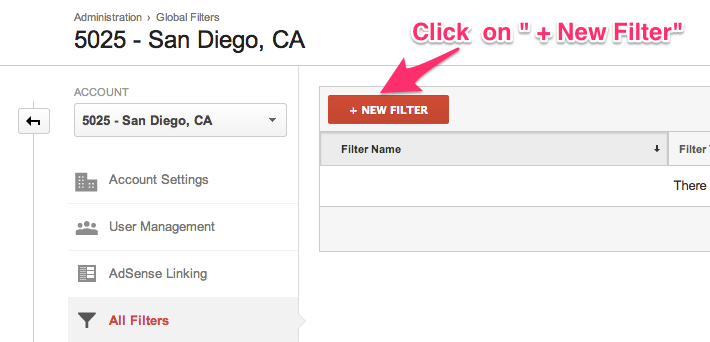
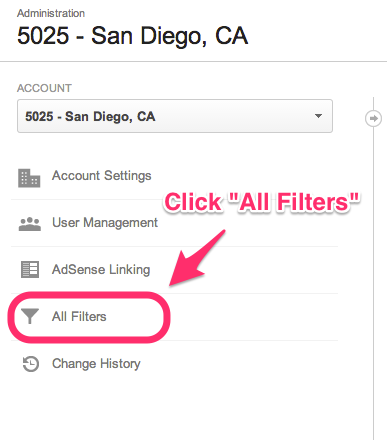
Now click on “All Filters” to setup the IP filter, then, click on “+ New Filter.”
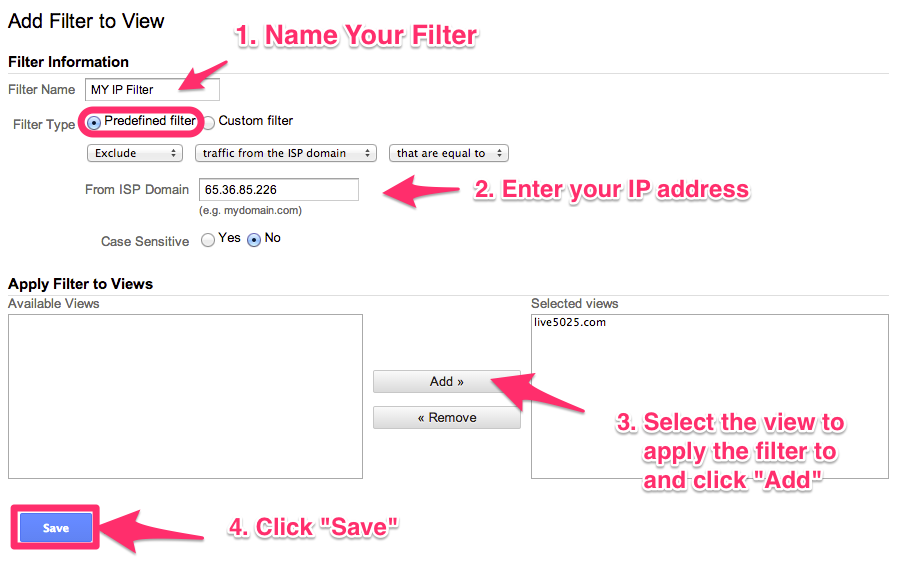
The last steps in the process are naming the filter, excluding the traffic from your IP address, and selecting the view to apply the filter to.
That’s it! You can now visit your website as often as you like, and Google Analytics will not report any of the visit information from your IP address.
Please note that you may want to keep an unfiltered view of your website. What you can do is copy the original (unfiltered) profile view and then apply filters to that copy and not to the entire account.
Here is a brief overview of how to copy the original profile view and then start the filtering process again, except this time under the “View” section of the “Admin” dashboard:
Click on the “Admin” tab again. Then, in the “View” section of the dashboard, select “View Settings.”

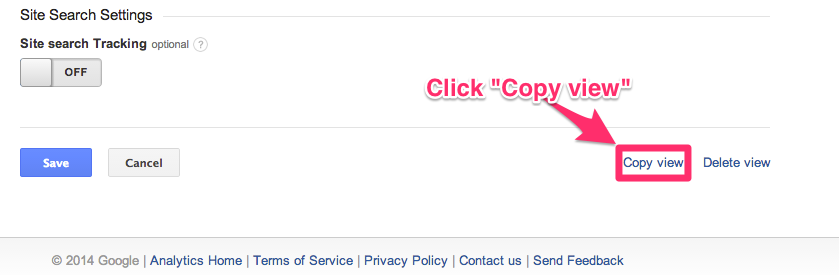
Once you’ve opened the settings for the unfiltered view, scroll down and click on “Copy view.”
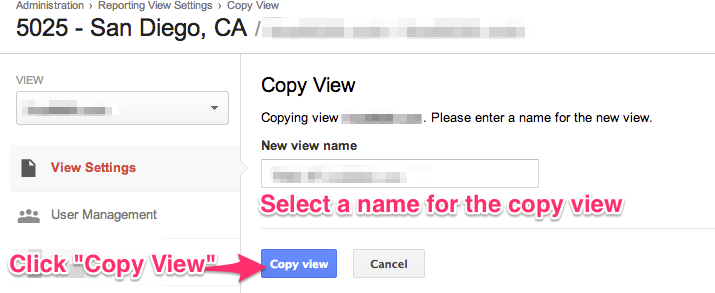
Then name your view something like “IP Filtered View” and click “Copy view.”
Now you’ll have a view of your profile that can be altered while still keeping a view of the property that is unfiltered.
After creating your view copy, you don’t have to set up a filter for the entire account. You can simply create one for the specific view by selecting your view and then clicking on “filters.”
Once you’ve clicked on “filters” from the “View” section of the “Admin” dashboard, you can now add a filter by starting at the beginning of this tutorial.
Good luck!